08. Monitor your AWS Costs and Credits
Monitoring your AWS Costs and Credits
All AWS services are a pay-as-you-go service, so we urge our students to closely monitor their usage costs and if they have adequate credits available to complete their project/task. Follow the instructions below to do that:
Step 1. Log into your AWS account.
Step 2. Examine your costs
Go to https://console.aws.amazon.com/billing/
You should see the following billing dashboard where it will show your costs.
](img/screen-shot-2020-05-21-at-5.07.48-pm.png)
Snapshot: AWS Billing Dashboard
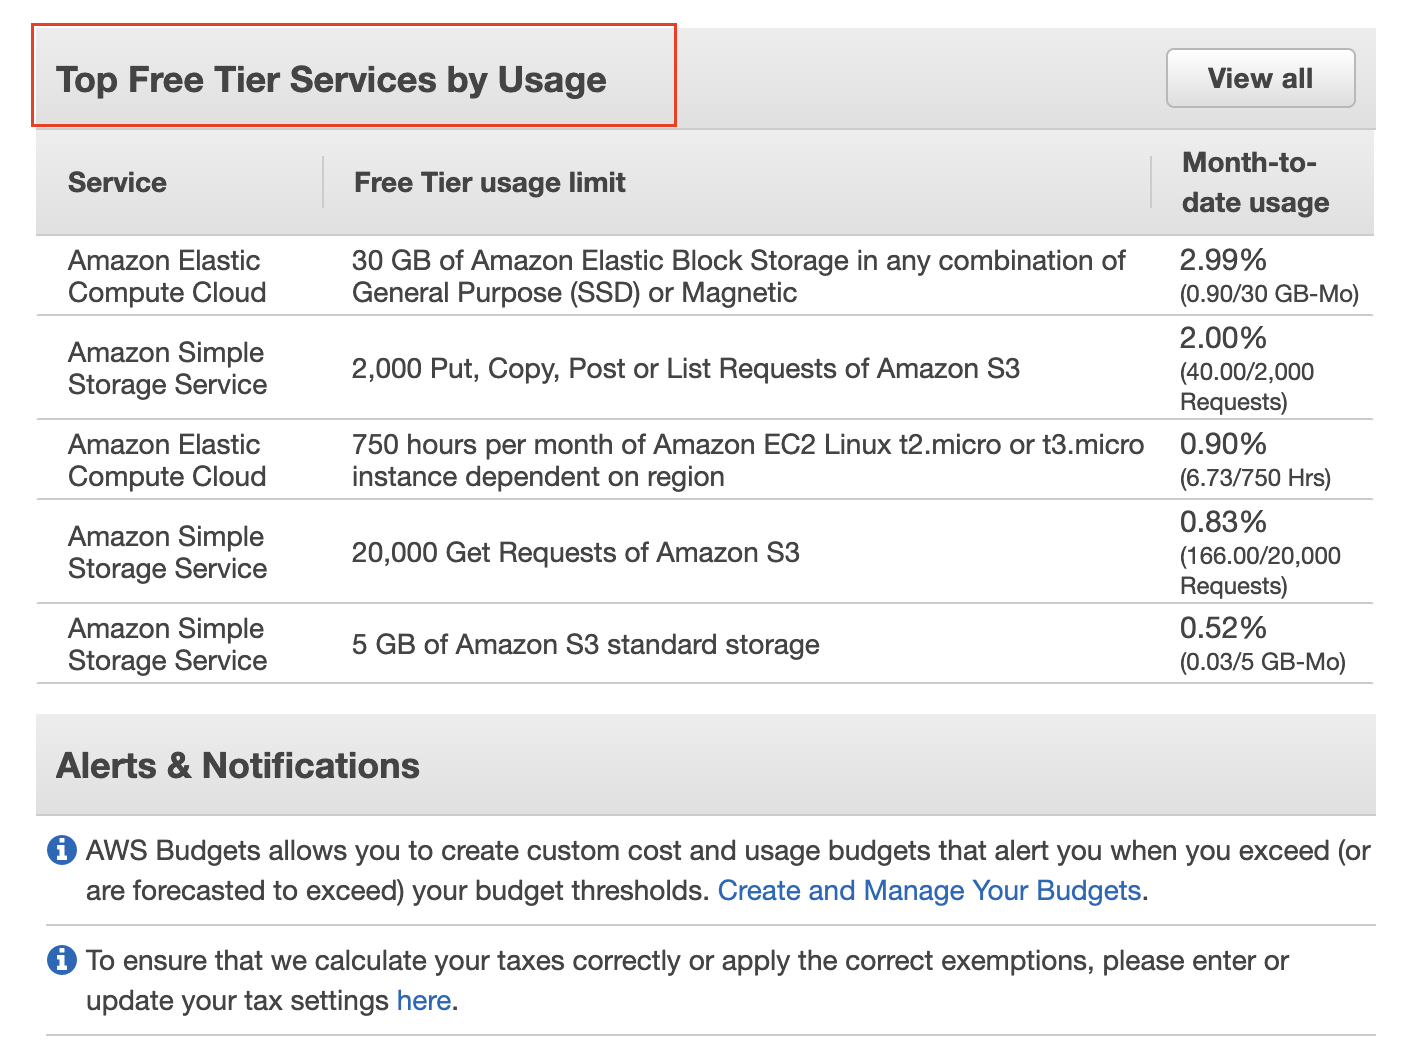
If your account has been created within one year from the current date, your AWS Billing Dashboard will also show the resource usage statistics for the free tier services. See the snapshot below:

Snapshot: Resource usage statistics for top-free tier services.
Step 3 (optional). Check the value of your credits.
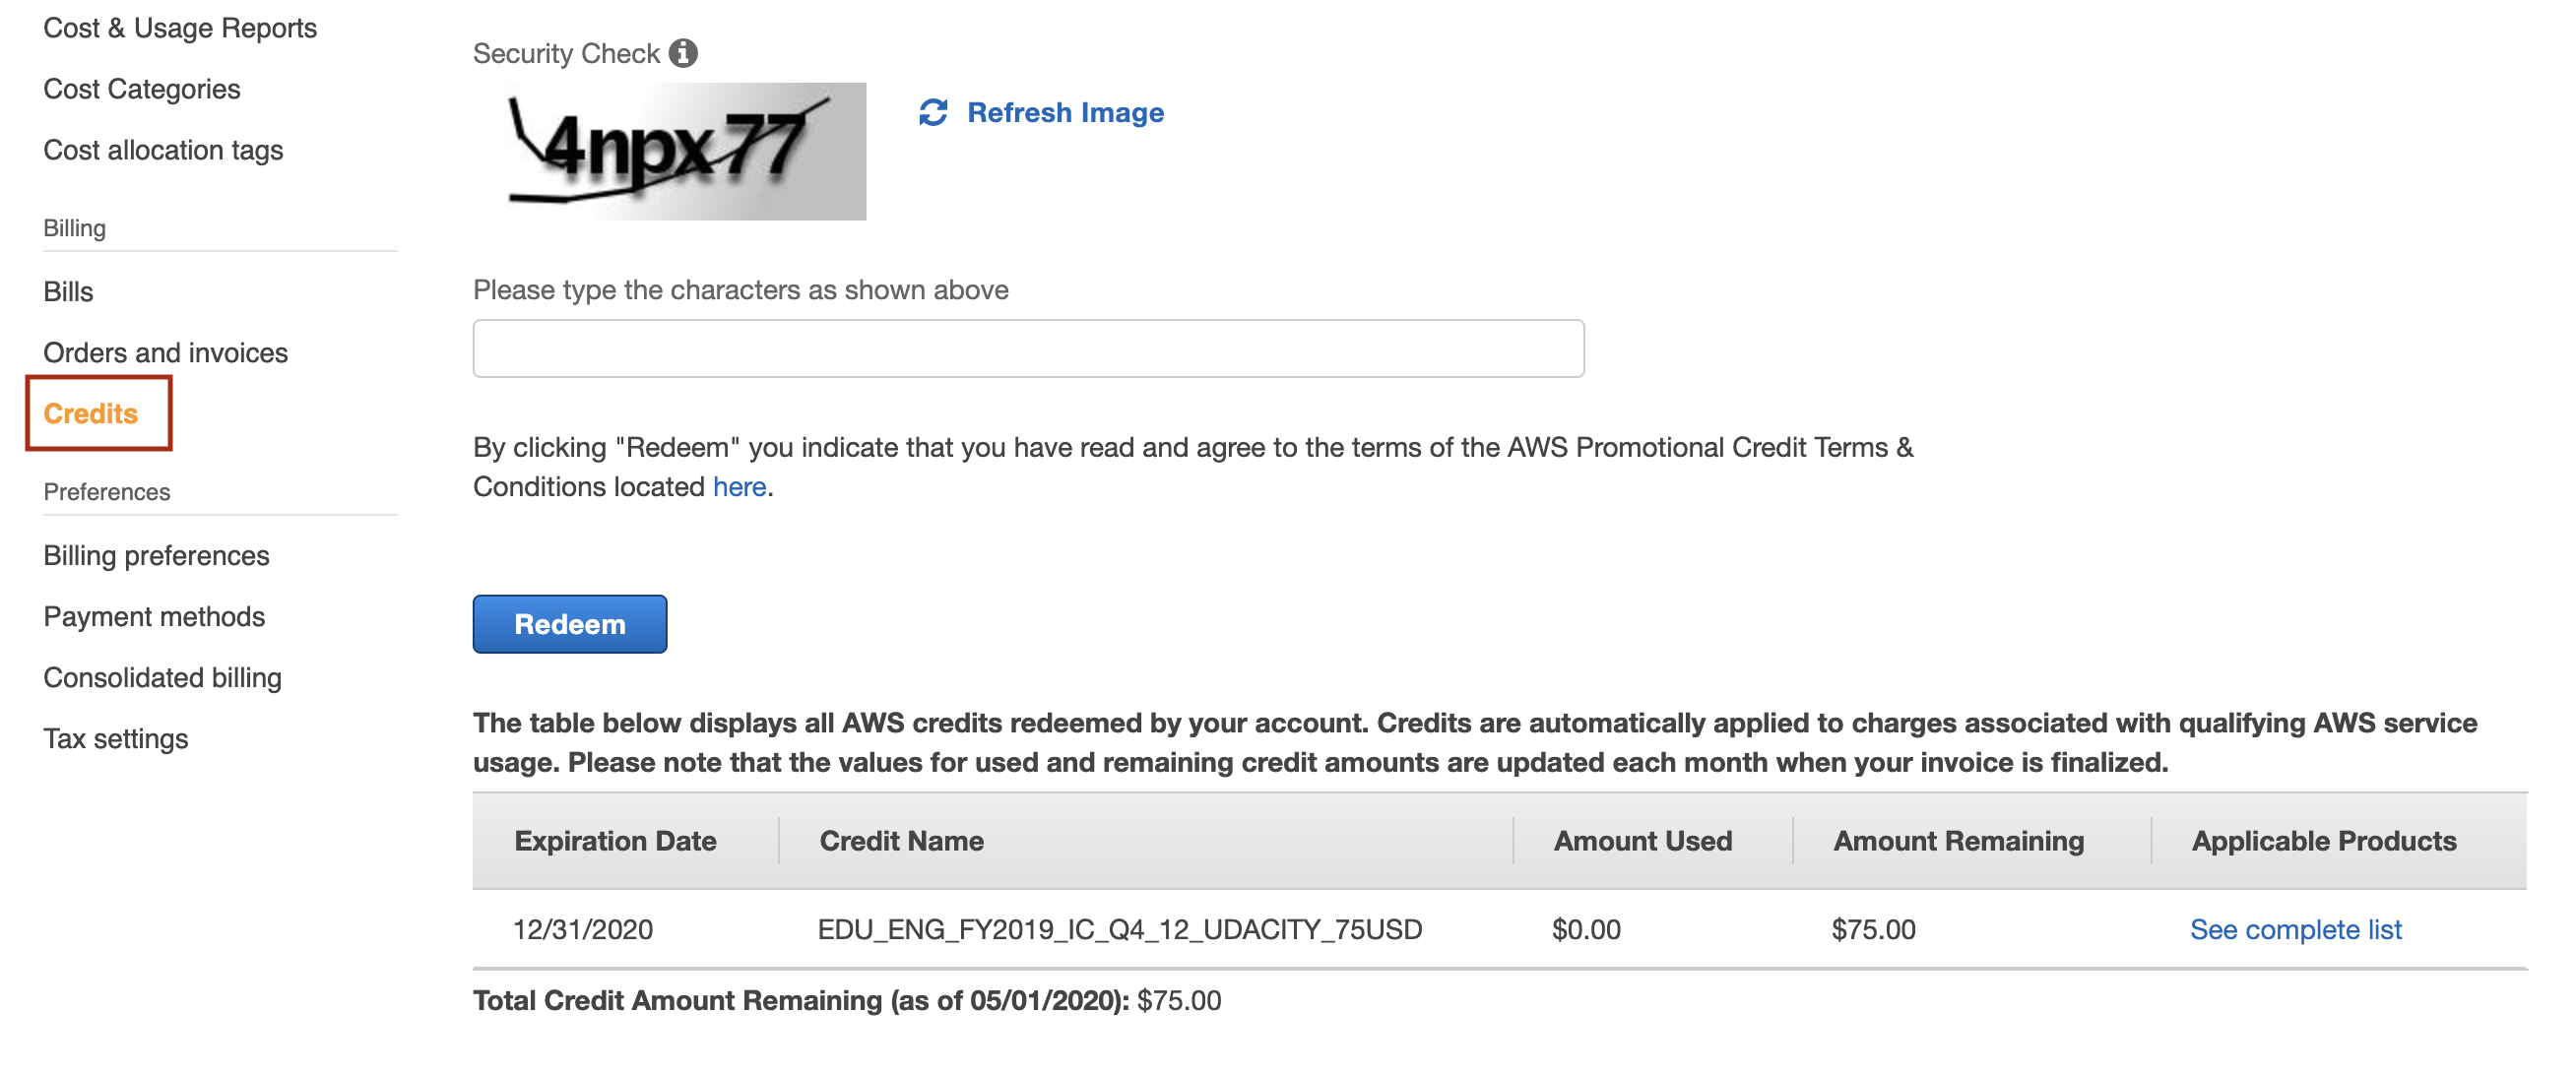
Click on the "Credits" from the left navigation menu, and the following screen will show your available credits.

Snapshot: Track credit (promo-code) balance
Note: For student learning, Udacity has partnered with Amazon to provide nominal credits for the student to complete their course work. Please understand that these credits are limited and available for you to use judiciously. You are responsible for any additional costs beyond the given credits.
When will I be charged?
There are no tools to limit usage to what’s covered by the AWS Free Tier. This means that you are responsible for the services that you launch. You will be charged standard pay-as-you-go service rates for using AWS resources that exceed the AWS Free Tier limits and the credits provided by Udacity.
Shut Down your Resources, if not in use
The Free Tier benefits and the credit amount provided by the Udacity Support team will be sufficient for you to complete your Nanodegree program.
Note: We recommend you shut down every resource (e.g., EC2 instances, or any other hosted service) on the AWS cloud immediately after the usage, otherwise you will run out of your free promo credits.
Remember, even if you are in the middle of the project and need to step away, PLEASE SHUT DOWN YOUR RESOURCES. You can re-instantiate later.